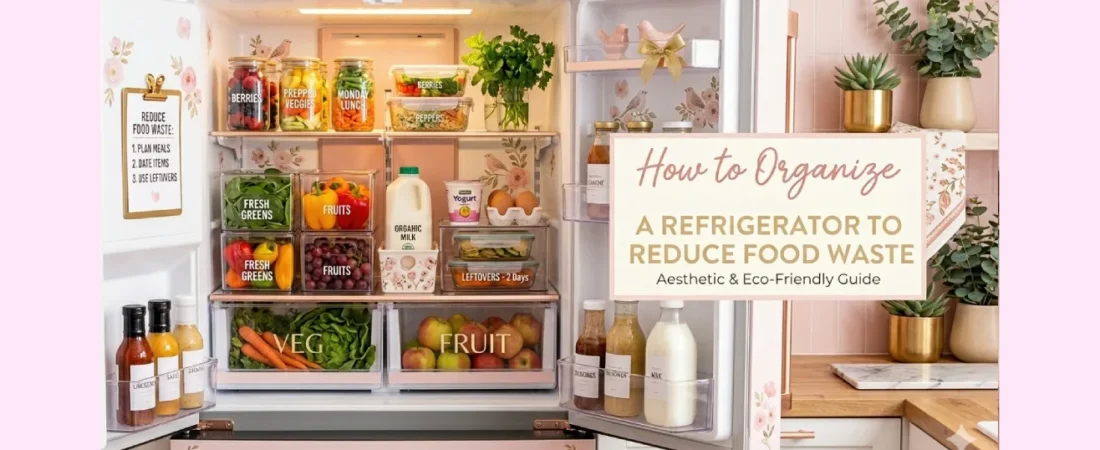
If you’ve ever thrown out a full bag of wilted spinach or found a container of leftovers growing something unrecognizable in the back of your fridge this guide is for you. Knowing how to organize a refrigerator properly isn’t just about aesthetics. It directly impacts how much food you waste, how much money you lose, and how much stress you feel every time you open that door. Here, you’ll get a complete zone-by-zone system, the best affordable products, and habits that actually stick.
😩 Why Fridge Organization Is Harder Than It Looks (And How to Fix It)
Most people think they just need to be “tidier.” But the real problem runs deeper than that.
Here are the three root causes:
- No zone system. When everything just goes “wherever it fits,” dairy ends up next to raw meat and leftovers get buried behind condiments
- Wrong temperature zones. Most people don’t know that different fridge shelves run at different temperatures storing food in the wrong spot accelerates spoilage
- Out of sight, out of mind. Once something gets pushed to the back, it simply doesn’t exist until you find it too late three weeks later
I used to clean out my fridge every Sunday and still find food I’d forgotten buying two days earlier. The issue wasn’t laziness. I just had no system. Once I built one, my food waste dropped dramatically. That’s what this guide will give you.
Pro tip: Before changing anything, do a full audit of what you’re regularly throwing away. That list tells you exactly where your system is failing.
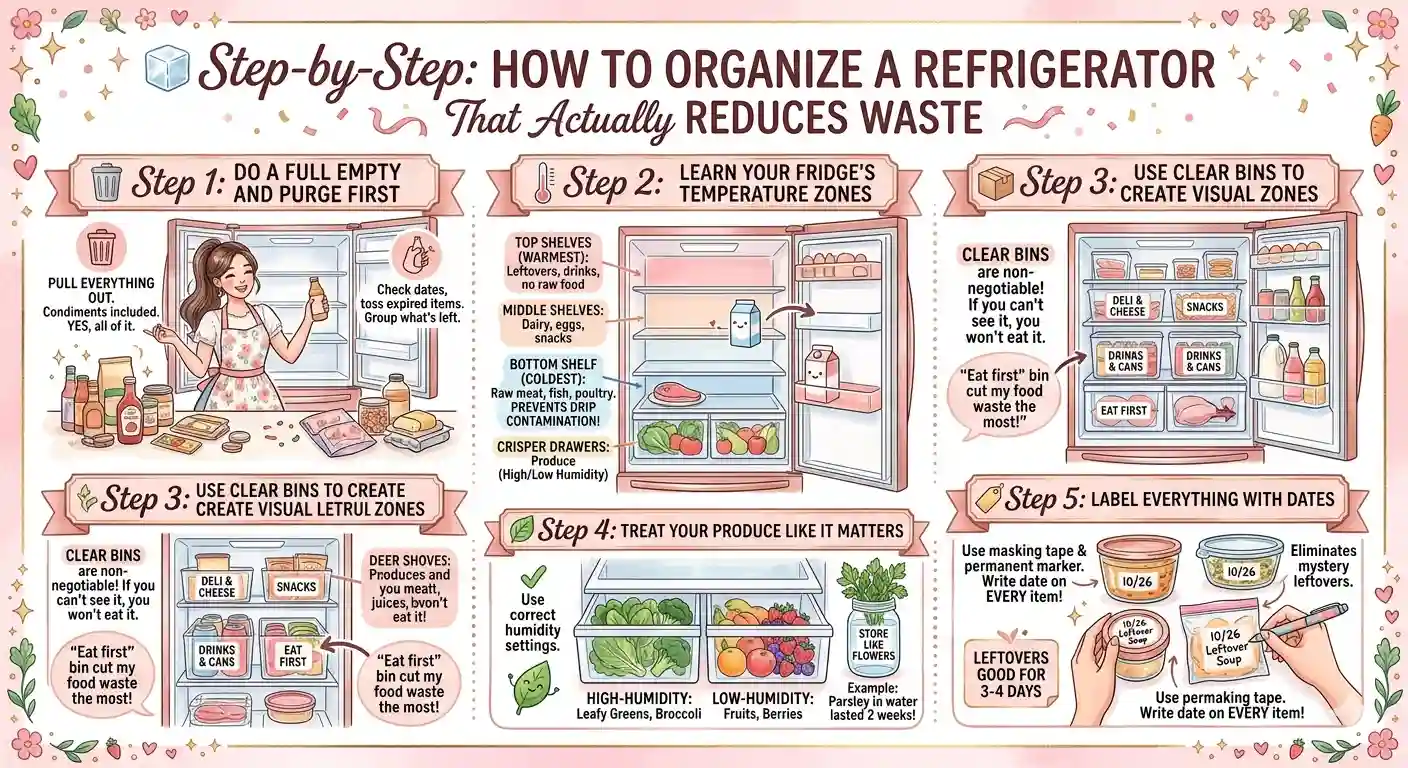
🧊 Step-by-Step: How to Organize a Refrigerator That Actually Reduces Waste
🗑️ Step 1: Do a Full Empty and Purge First
Pull everything out. Every single item condiments included. Yes, all of it.
This feels extreme. Do it anyway.
- Check expiration dates on every bottle, jar, and container
- Toss anything that’s expired, moldy, or unidentifiable
- Group what’s left into categories: dairy, produce, proteins, leftovers, condiments, drinks
Concrete example: When I did this for the first time, I found four open bottles of ketchup at various stages of emptiness and a mustard that expired in 2022. Consolidating duplicates alone freed up an entire shelf.
🔍 According to the USDA, the average American household throws away between $1,500 and $1,900 worth of food per year. A significant portion of that waste happens simply because people can’t see what they already have.
🌡️ Step 2: Learn Your Fridge’s Temperature Zones
This is the step most guides skip and it’s the one that makes the biggest difference.
Your refrigerator is not the same temperature everywhere, and storing food in the wrong zone speeds up spoilage:
- Top shelves (warmest): Leftovers, drinks, ready-to-eat foods nothing raw here
- Middle shelves: Dairy (milk, yogurt, cheese), eggs
- Bottom shelf (coldest): Raw meat, fish, poultry always on the lowest shelf to prevent drip contamination
- Crisper drawers: Produce high-humidity drawer for leafy greens and vegetables, low-humidity for fruits
- Door shelves (warmest zone overall): Condiments, juices, butter never milk or eggs, despite what fridge door design suggests
I moved my milk from the door to the middle shelf and it started lasting nearly a full week longer. Temperature placement isn’t a minor detail it’s the core of the system.
Pro tip: Label each zone with a small adhesive label or dry-erase marker on the shelf itself so everyone in your household knows where things go.
📦 Step 3: Use Clear Bins to Create Visual Zones
Once you know where things should go, clear bins help keep them there.
Clear bins are non-negotiable if you can’t see it, you won’t eat it. Opaque containers are where food goes to die.
Organize your bins by category:
- One bin for deli meats and cheeses
- One bin for snack items and small containers
- One bin for “eat first” anything close to expiration goes here, front and center
- One bin for drinks and cans
The “eat first” bin is the single habit that cut my food waste the most. Anything approaching its expiration date goes in that bin immediately. It’s the first place I look when I’m hungry.
🔍 A 2021 study by ReFED (a food waste nonprofit) found that better storage practices including clear containers and proper zoning could prevent up to 40% of household food waste without any additional spending.
🥬 Step 4: Treat Your Produce Like It Matters
Produce is the most wasted food category in American households, and most of it spoils because of two things: wrong humidity settings and no system for using it.
Here’s how to fix it:
- High-humidity drawer: Leafy greens, broccoli, carrots, herbs these need moisture to stay crisp
- Low-humidity drawer: Apples, grapes, berries, stone fruits they need airflow or they rot faster
- Store herbs like flowers: Trim the stems and place them in a small glass of water in the fridge they last 2–3 times longer than lying flat in a bag
Concrete example: I started storing my fresh parsley in a small mason jar with an inch of water, loosely covered with a plastic bag. It went from lasting 4 days to lasting nearly two full weeks. Same parsley. Different method. Completely different result.
🔍 The Natural Resources Defense Council (NRDC) reports that Americans throw away roughly 25% of the produce they buy most of it due to improper storage rather than overbuying.
🏷️ Step 5: Label Everything With Dates
This step takes 30 extra seconds per item and eliminates the biggest source of fridge waste: mystery leftovers.
Use a roll of masking tape and a permanent marker. Write the date on:
- Every leftover container, the day you made it
- Any open packages or partially used ingredients
- Pre-portioned meal prep containers
A general rule: leftovers are good for 3–4 days in the fridge. If you can’t see the date, you won’t follow the rule.
I started doing this after throwing away a full pot of homemade soup because I genuinely couldn’t remember if it was three days old or six. Now I never guess. Every container has a date. It takes seconds and saves real money.
🔍 The FDA estimates that date labeling confusion not knowing if something is still safe contributes to roughly 20% of consumer food waste annually.
🛒 Best Products for Fridge Organization (All Under $25)
You don’t need to spend a lot to build a great system. Here are six picks that deliver real results:
| Product | Why It Works | Approx. Price |
|---|---|---|
| Vtopmart Clear Fridge Bins (set of 8) |
Stackable, handle cut-outs, fits most shelves |
~$22 |
| OXO Good Grips Produce Keeper |
Adjustable vent keeps produce fresh longer |
~$20 |
| Lazy Susan Turntable (fridge-safe) |
Perfect for condiment shelf — no more digging |
~$14 |
| Masking tape + Sharpie |
The original date-labeling system. Free if you have them. |
~$3 |
| Herb Keeper (Prepara or similar) |
Keeps fresh herbs alive 2–3x longer |
~$18 |
| Egg Holder Tray (clear, stackable) |
Frees up the middle shelf, eggs stay visible |
~$10 |
Pro tip: Start with just the clear bins and the lazy Susan. Those two changes alone will transform the way your fridge functions no need to buy everything at once.
❌ Common Mistakes to Avoid
- Storing eggs and milk in the door. Fridge doors are the warmest part of the appliance fix: move both to the middle shelves where temperature stays consistently cold.
- Skipping the “eat first” zone. Without it, items near expiration get buried fix: dedicate one clear bin at eye level exclusively to food that needs to be eaten within the next 1–2 days.
- Stacking produce directly on shelves. Greens wilt faster without proper humidity control fix: use a produce keeper or at minimum, the correct crisper drawer with the right humidity setting.
- Letting the door fill up with duplicates. Three open jars of the same hot sauce is a fridge organization red flag fix: during your monthly purge, consolidate duplicates and clear out anything you haven’t touched in 30 days.
📅 How to Keep Your Fridge Organized Long-Term
The system works if and only if you maintain it. Here are four habits that each take under five minutes:
- Sunday shelf scan: Every Sunday before grocery shopping, spend 2 minutes scanning every shelf. Move anything close to expiration into the “eat first” bin. This prevents waste before it happens.
- Wipe-and-restock routine: When you come home from the grocery store, take 3 extra minutes to wipe down a shelf before restocking it. Spills caught early prevent the “mystery smell” that takes 45 minutes to find.
- Monthly full audit: On the first of every month, pull out every bin and check what’s hiding at the back. Toss, consolidate, reset.
- Grocery list on the fridge: Keep a notepad or whiteboard on the fridge door. When you finish something, write it down immediately. Stops the “I thought we had yogurt” problem at the store.
Honest caveat: This system takes about 90 minutes to set up properly from scratch. Block off a Saturday morning. Once it’s done, maintenance is genuinely five minutes a week but the setup requires a real commitment upfront.
🎉 Final Thoughts + Call to Action
Here’s what matters most from everything above:
- Temperature zones are everything storing food in the right part of the fridge is the single most impactful change you can make to reduce spoilage
- Clear bins and date labels turn an invisible fridge into a visible one and visible food gets eaten
- The “eat first” bin is your most powerful daily habit it takes 10 seconds to maintain and prevents most of your weekly food waste
Start today with just one shelf. Empty it, wipe it down, put things back in the right zone. That’s it. One shelf, fifteen minutes, real impact.
Ready to go further with your kitchen organization? Check out our guide on Kitchen Drawer Organization Ideas That Actually Work the same step-by-step logic, applied to the space you open fifty times a day.